
how to change a automatic to a manual
Learn how to switch from automatic to manual transmission with our step-by-step guide. Save money and gain control over your driving experience.
Converting an automatic to a manual transmission involves complex steps, requiring specialized tools and expertise. It enhances driver control and fuel efficiency but demands careful planning and execution.
Understanding the Basics of Transmission Types
Manual and automatic transmissions are the two primary types of gearboxes in vehicles. Manual transmissions rely on a driver-operated clutch pedal and gearshift to change gears, offering precise control. Automatic transmissions use a torque converter and sensors to automatically shift gears based on speed and load. Other types include continuously variable transmissions (CVTs) and dual-clutch systems, blending elements of both. Each transmission type has unique mechanisms, such as synchromesh in manuals and planetary gears in automatics. Understanding these differences is crucial for evaluating compatibility and planning a successful conversion; This knowledge helps in selecting the right components and tools for the swap, ensuring a smooth transition to manual operation.
Why Convert from Automatic to Manual?
Converting from automatic to manual transmission offers several benefits, including enhanced driving control and improved fuel efficiency. Manual transmissions typically provide better acceleration and a more engaging driving experience. Additionally, manuals often require less maintenance and can be more cost-effective in the long run. For enthusiasts, the ability to manually shift gears can enhance the overall driving satisfaction. Furthermore, manual transmissions are lighter, which can improve a vehicle’s power-to-weight ratio. However, this conversion is not without challenges, as it involves significant mechanical and electrical modifications. The decision to convert should be based on personal preference, driving habits, and the specific requirements of the vehicle.

Preparing for the Conversion
Preparing for the conversion involves assessing your car’s compatibility, gathering essential tools and parts, and making initial modifications to accommodate the manual transmission system.
Evaluating Your Car’s Compatibility for Manual Transmission
Evaluating compatibility involves assessing your car’s engine type, drivetrain, and availability of manual transmission components. Ensure the engine is compatible with a manual setup, as some engines are designed exclusively for automatics. Check if a manual transmission kit or compatible parts exist for your specific vehicle model. Older models often have better support for manual conversions than modern cars with complex electronics. Additionally, consider the vehicle’s weight distribution and axle ratio, as these factors impact the feasibility of the conversion. Consulting a mechanic or transmission specialist is recommended to confirm compatibility and avoid costly mistakes during the process.
Gathering Tools and Parts Needed for the Conversion
Gathering the necessary tools and parts is crucial for a successful conversion. Essential components include a manual transmission kit, clutch system, flywheel, clutch pedal assembly, and shift linkage. Additional parts like universal joints and transmission mounts may be required. Tools needed include wrenches, socket sets, a jack, jack stands, and specialized equipment like a clutch alignment tool. Ensure all parts are compatible with your vehicle’s make and model. Consulting a mechanic or transmission specialist can help verify the correct components and tools. Proper preparation prevents delays and ensures a smooth conversion process, saving time and reducing potential complications during installation.

Removing the Automatic Transmission
Removing the automatic transmission involves disconnecting components like the torque converter, transmission lines, and electrical connectors. Extracting it requires careful handling and specialized tools to ensure safety and avoid damage.
Disconnecting the Automatic Transmission Components
Disconnecting the automatic transmission components begins with removing the torque converter and transmission lines. Drain the transmission fluid beforehand to prevent spills. Next, disconnect the electrical connectors linked to the transmission, such as sensors and solenoids. Remove the transmission mounts and crossmember bolts to free the unit. Carefully detach the driveshaft and any linkages connected to the automatic transmission. Use jack stands to support the vehicle and ensure proper tools like wrenches and socket sets are available. Protective gear is essential to avoid injury during this process. Proper disconnection ensures safe removal and prevents damage to surrounding components. Precision is key to avoid complications.
Extracting the Automatic Transmission from the Vehicle
Extracting the automatic transmission requires careful preparation and specialized tools. Begin by securing the vehicle on a lift or jack stands to ensure stability. Use a transmission jack to support the transmission’s weight, as it is typically very heavy. Disconnect any remaining components, such as the torque converter and transmission mounts, to free the unit; Gently maneuver the transmission out of the vehicle, taking care to avoid damaging surrounding parts like the engine or chassis. This step demands precision and patience, as improper handling can lead to costly damage or injury. Once removed, inspect the area for any debris and prepare for the manual transmission installation.

Installing the Manual Transmission
Installing the manual transmission involves fitting the new unit, ensuring proper alignment with the engine and drivetrain. This step requires precision and careful adjustment for optimal performance.
Mechanical Installation of the Manual Transmission
The mechanical installation of a manual transmission requires careful handling to ensure proper alignment and secure mounting. Begin by positioning the manual transmission into the vehicle, aligning it with the engine and drivetrain components. Use a transmission jack for stability and precision. Once aligned, bolt the transmission to the engine, ensuring all connections are tight and properly secured. Reattach the driveshaft and axles, making sure they are correctly aligned to avoid vibration and wear. Use a torque wrench to tighten all bolts to the manufacturer’s specifications. Proper installation ensures smooth gear engagement and optimal performance. Always consult a repair manual or a professional for accuracy.
Aligning and Securing the Manual Transmission
Aligning the manual transmission is critical for proper operation and to prevent damage. Use a transmission jack to carefully position the unit, ensuring the bellhousing aligns with the engine. Check the pilot bearing or sleeve for proper fitment and adjust as needed. Once aligned, secure the transmission using the provided mounts and crossmembers, tightening all bolts in a star pattern to avoid misalignment. Verify the transmission is level and plumb, then torque all fasteners to the manufacturer’s specifications. Double-check all connections, including the driveshaft and axles, to ensure they are properly seated and aligned. This step is crucial for smooth operation and long-term reliability.
Modifying the Drivetrain
Modifying the drivetrain involves adjusting the driveshaft length and axle alignment to accommodate the manual transmission, ensuring proper power delivery and vehicle stability during operation.
Adjusting the Driveshaft and Axles
Adjusting the driveshaft and axles is crucial for proper power transmission. The driveshaft must be measured and modified to fit the manual setup, ensuring it aligns with the new transmission. Axles may also need adjustment to maintain correct angles and prevent vibration; Proper alignment ensures smooth power delivery and prevents damage to drivetrain components. This step requires precision and may involve shortening or replacing the driveshaft for optimal performance.
Upgrading the Clutch System
Upgrading the clutch system is essential when converting to a manual transmission. The automatic transmission does not have a clutch, so a new clutch kit must be installed. This includes a clutch disc, pressure plate, and throw-out bearing. The flywheel may also need to be resurfaced or replaced to ensure proper engagement. The clutch master and slave cylinders are installed to connect the clutch pedal to the transmission. Hydraulic lines are then routed and connected to complete the system. Proper alignment and bleeding of the hydraulic system are critical for smooth operation. This step ensures the clutch engages and disengages correctly, allowing precise control over gear changes.
Electrical and Hydraulic Modifications
Converting to manual requires updating the electrical system for clutch control and installing hydraulic components like master and slave cylinders to ensure proper gear engagement and disengagement.
Updating the Electrical Control Unit (ECU)
Updating the ECU is crucial for ensuring compatibility with the manual transmission. The ECU must be reprogrammed to recognize the new clutch and gearshift inputs. This involves modifying the vehicle’s software to disable automatic shifting protocols and enable manual control signals. In some cases, additional sensors may need to be installed to monitor clutch pedal position and gear selection. Modern vehicles with advanced CAN bus systems may require specialized tools or reflashing to complete the process. Failure to properly update the ECU can result in poor transmission performance or complete system failure. Consult a professional if unsure about the process.
Installing the Clutch Master and Slave Cylinders
Installing the clutch master and slave cylinders is essential for enabling manual transmission control. The master cylinder is mounted to the firewall and connected to the clutch pedal, while the slave cylinder links to the transmission. Proper alignment and secure mounting ensure smooth clutch engagement. After installation, bleeding the hydraulic system is necessary to remove air bubbles, guaranteeing precise clutch operation. Improper installation can lead to clutch failure or inconsistent performance, emphasizing the need for careful execution. If unsure, consulting a professional is recommended to ensure reliability and safety.
Final Adjustments and Testing
After installation, test the manual transmission for smooth shifting and proper clutch engagement. Check for leaks, ensure all linkages are secure, and perform a road test.
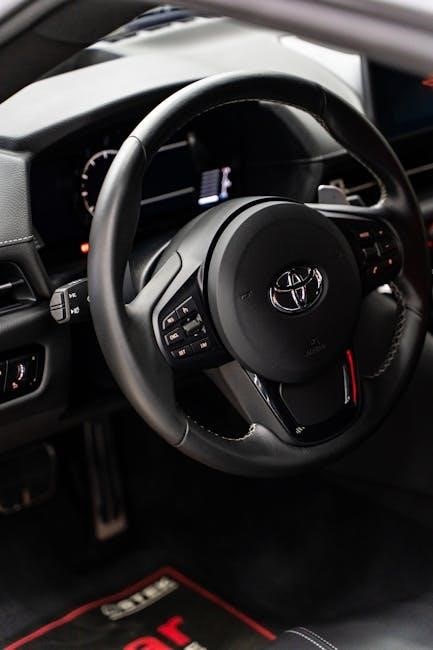
Setting Up the Gear Shifter and Linkage
Installing the gear shifter requires precise alignment with the transmission’s input shaft. Ensure the linkage is securely connected to the shift fork, adjusting for smooth gear engagement. Drilling holes for the clutch pedal and fitting the pedals correctly is crucial. The shifter assembly must be bolted firmly to the floor pan, and the linkage rods should be adjusted to eliminate any play. Proper alignment ensures accurate gear shifts and prevents mechanical wear. Testing the shifter’s range of motion and engagement clarity is essential before finalizing the setup. This step is critical for optimal driving performance and reliability.
Testing the Manual Transmission for Proper Functionality
After installation, a thorough test drive is essential to ensure the manual transmission operates smoothly. Check for seamless gear shifts, proper clutch engagement, and absence of grinding noises. Verify that the vehicle starts in neutral and that all gears, including reverse, function correctly. Monitor for any fluid leaks from the transmission or clutch system. Test acceleration, deceleration, and shifting under various driving conditions to confirm optimal performance. If any issues arise, such as difficulty shifting or slipping gears, adjustments or repairs may be necessary. Successful testing confirms the conversion’s success and ensures reliable operation.